Tuesday, December 13, 2011

Tis the end

I really enjoyed the various techniques we learned this semester. especially focusing on:

  1. chasing and repousee
  2. Etching
  3. Photo etching
  4. Marriage of metals
  5. Making ingots
  6. Hydraulic die forming
I also learned some chain making and finishing techniques from some of my peers such as an etruscan chain and different patinas. Also observed that in order to copper plate a piece, you put it in a separate container of pickle with steel wool. I just learned how to make the chain three days before critique. Definitely on my list for things to try next semester. I'm already trying to figure out a theme. 

I feel like I have a ton more tools to design with so I am confident that my designs will become more sophisticated.

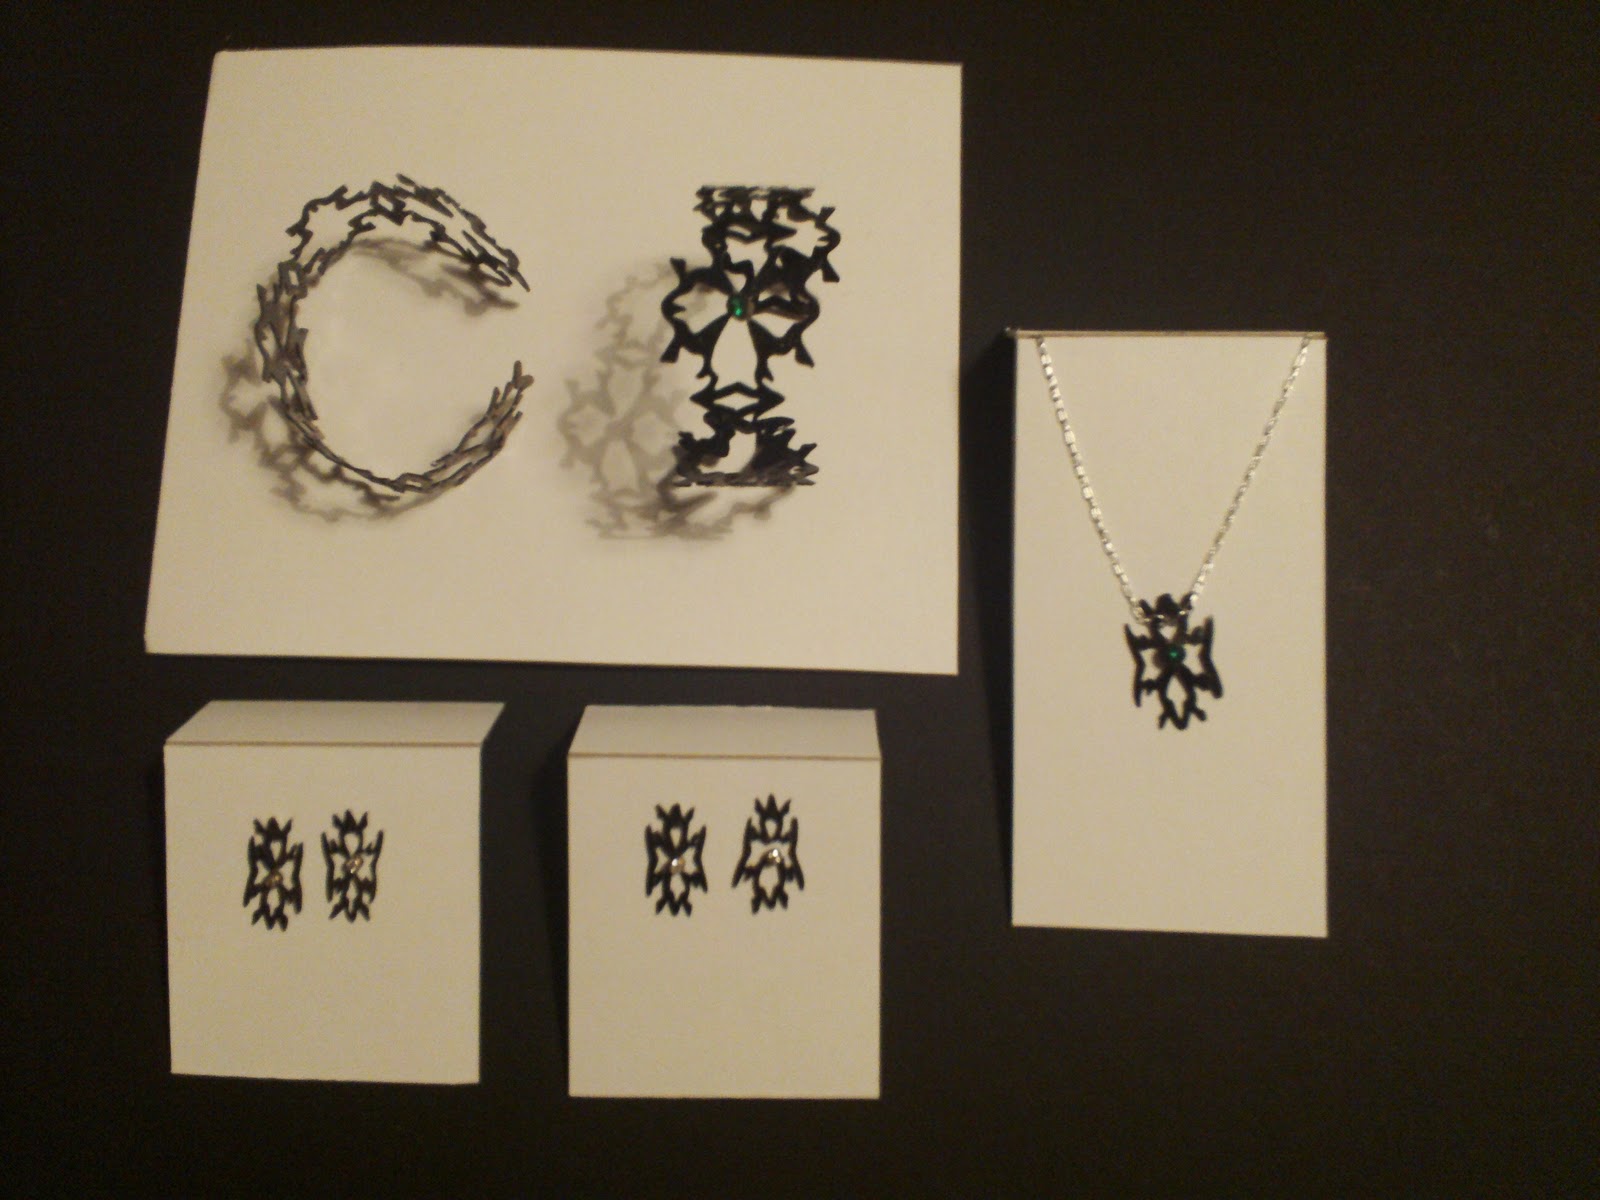
I am happy with the work that I produced this semester. This was my first Junior studio. I learned a completely new technique with the first project of chasing and repousee. The second project (production) taught me what its like to make multiples and the additionally planning that is necessary when producing in quantities. I learned that I would have a much easier time if I simplified my design cutting wise. It took me a very long time to cut out each piece. I also practiced tube setting. I have not used this process in a piece yet. I really enjoy tube setting stones and I like how it looks. The third piece (pattern and texture) I practiced riveting. The only other time I did this technique was on the hinge on the box I made in applied jewelry techniques class. I learned that chains don't have to be made of wire links, they can be more elaborate fun shapes cut out of metal. I also didn't know it could be useful to ball up the end of a piece of metal by heating and melting it.  Most importantly from this project I learned how to etch. I will definitely use this technique in the future. I am excited to try photo etching. Over break I want to play around in photoshop to get some nice just black and white texture possibilities. Now that I know so much more about metal, I am ready to hit the ground running. 

Monday, December 12, 2011

Finished Texture/Pattern Piece

Ta da!

All cut out and ready to etch

I have the clasp and transition from the piece to the chain figured out. Still have to drill the holes and rivet each link. I tried melting the tip of the teardrop shape into a little ball but at times that wasn't giving me the effect I wanted so the final piece is the mix of the too. Another problem that I ran into was having an adequate riveting hammer. I ordered one specifically for this project and when the shipment came in, the hammer was missing from the order. For not have the correct hammer, I feel the rivets came out fairly decently. The top transition pieces are soldered onto the main piece. The other two main large pieces will be tube riveted to add a more three dimensional quality to the piece.


When adding the texture I wanted to obtain the feel that the water is rushing downward kind of like a waterfall or water dripping down a person. I put the texture more concentrated at the top because I feel the rushing water would be the heaviest or thickest there and hen thin out as it spreads. I decided to use sharpie because I wanted a drawn, medium crisp look. Nothing about water is clear and precise so I didn't want the texture to feel that way. 

More development: Pattern and Texture

I made a sample piece of the chain in the left picture. It seems like it will work functionally. I also designed a transitional piece between the chain and the main pieces. I've started brainstorming some textures to use on the pieces. I still need to figure out a clasp.

Initial Sketches for Pattern and Texture Project

I'm playing with the concepts of a linked bracelet or pendant, layering metal, possibly marriage of metals, etching and or riveting. The bracelet pieces are connected by a wire that is riveting at both ends.

The stones have arrived!

Just got the stones for this piece! This was my original production piece but due to time I changed to a differnet design but i still want to make multiples of this design but now I can perfect it. The stones are Blue topaz, and yellow and white cubic zirconia. I'm still adjusting the wax to get it how i want. then next step: cast

Student Sale

I find pricing work always difficult. Below is the pricing worksheet we were given in class. I decided to sell the earrings for 45, pendant for 30, the bracelet with a stone for 65 and the bracelet without for 55. I sold both the pendant and the stone less bracelet in the sale! my first jewelry to ever be sold. I would like to build a larger body of work in order to sell. I want to explore the techniques of production further. Over christmas break, i am going to design and map out the steps necessary to create one or two production pieces.

Production Pieces!

Still too delicate

Above are my ideas to add metal to make the delicate pieces a bit more wearable and practicable. 
My initial solution to add sturdiness to the bracelet is seeming less like a good idea now because it is required a lot of clean up. Since the metal is already so delicate and thin, i don't think it can take all the sanding and might break. Soooo this idea is being discarded :(

Monday, November 7, 2011

Ready Set Saw!

I textured my metal by putting it through the rolling mill with 60 grit sand paper. I then attached three of them with rubber cement and set out for hours of sawing fun! When I finished, I realized my metal was much thinner than it appeared to me in the beginning. The pieces are super delicate and I'm not sure they can withstand being a bracelet. I think they're super awesome though and i'm thinking of ways to add sturdiness or to repurpose them. Here they are:

Tube Stone Setting

I'm trying to figure out how I want to incorporate the tube set stone in my design. When I drew it originally, I have the stone floating so I have to figure out how I want to attach it. Here are some of my ideas:

Change in Plans

So since I still do not have my stones for the wax pendant, I have switched production project ideas. I will definitely continue to work on the pendant. My new project is going to be a series of five cuff bracelets that have tube set stones in them. Here are some of my ideas, i've been playing with scale and the amount of repetition.


Carved Wax

Here is the wax carving in progress. 
Its not complete because I haven't received my stones in the mail yet. Cant wait to get them! The shape is hard to see in the photo but there is a lot of variation in line thickness. It is meant to mimic how a thick liquid would bunch up in a tube like structure. I still want to push the movement in the piece. Its not quite where I want it yet.

Monday, October 24, 2011

Production function

Art Jewelry Magazine had an article this month focusing on production strategies and methods. How appropriate! The article is titled, Making multiples by Michael David Sturlin.  I thought an interesting point that they mentioned was to be careful not too overproduce. The article stated, "you want to make enough so that your productive but not so many that it becomes tedious." Once you lose your enthusiasm, you lose some of the beauty your work can posses. "If your bored, the quality of your work will slip." Motivation is key!

The production processes that the article talked about were making a template, blanking dies, Hydraulic press and conforming dies. And of course Casting.

Saturday, October 15, 2011

Stone Setting in wax

Production Piece ideas

I want to carve something in wax, cast it, then rubber mold it to make multiples. Here are some sketches, I was inspired by the overall shape of moose antlers and how they resemble the movement of water. I want to merge the two for the design below, which will possibly have a stone set in it.

Reflections on Chasing and Repousee

I really like the wide variety of outcomes you can get with this technique. It is versatile and can be used to form and texture metal with few constraint. What I dislike about the process is the fact that you have to keep removing the piece from the pitch to anneal it. The pitch sticks to the piece and is a pain to burn off. I would like to experiment with making tools with creative ends for texture stamping. Now that I know this technique, I will begin to start thinking what I can design with it. Such as setting a stone by moving the metal around the stone to hold it in place.

The finished Product

I apologize, I have not taken a photo of it yet

Progress

Pictures coming soon
Side note: This is an awesome book, strongly recommended. Our library doesn't have it but you can interlibrary loan it.

Round Two!

Got it all lined

Burning the pitch off and annealing 

New tiny tools :)

Here are my new tools:
I have a triangle tool! Cant wait to use it!

Round one!

I adjusted the size of my sketch to about 3 1/2 inches by 1 1/2 inches. When I started my piece, i discovered that my tools are waaaay to large for my desired end product. The biggest problem was my lining tool. its not fine enough. I am going to buy smaller round steel and make small tools to work with. Here is my experimentation in preparation for my piece:

realized that my design needed to be flipped so that it goes the direction i want it to. So above is reversed of what the final will look like.

So far i think i really like this process. It has a lot of possibilities which i like. Eventually i want to be able to set a stone with chasing a repousee. I saw some diagrams in a book on chasing and repousee that set a stone and it looks super awesome!

Sketches

The bottom drawing is the one i am leaning toward.
The finished piece will be a hair clip

Tools for Chasing and Repousee

I've finished my tools! Here they are:

Movement through Water

Definitely love the theme of water and the movement that is present in its form. When i was coming up with ideas, I found I was more interested in the organic shapes than I am in geometric ones so I wanted a theme that allows me to explore more organic forms. I also keep finding myself using animals as a starting point for designs, I'm not sure how to combine the two or if water is a sufficient theme. I have some pictures I took of running water, they will be up soon.

Friday, September 16, 2011

Semester Theme

In class today we presented our themes for the semester. The class really latched on to my proposal of using water as a reference. Tara suggested I take my own photos of water which I am excited to go do. I really like the idea of water as my reference but I'm not completely sure on a theme yet. Can water be the theme? Not super sold on that yet. ....We'll see

Design Ideas- Peacock

So i've been thinking about what exactly i want to do for this project. I started with the reference of a peacock and was thinking about having the organic body evolve into more geometric tail feathers. I don't usually like to do figurative work, I'm much more interested in the abstract. So i've been extracting the idea of the peacock into other drawings but I'm not crazy about any one of them yet.

What is chasing and repousee?


So i've been exploring what this technique is since until class the other day i had never heard these words before. For your reading pleasure here is wikipedia's definition: Chasing and Repousee is a metalworking technique in which a malleable metal is ornamented or shaped by hammering from the reverse side to create a design in low relief. I got a book from the library by Nancy Corwin which is proving to be fairly interesting. I seem to always forget you-tube as a good informational tool so I'm definitely going to check it out. I feel like I really need to understand the technique before I can design with it. I've been working on my tools and so far I'm kind of addicted to making them. I think I'm really going to enjoy this project.